
Tips and Recommendations
| General Tips | Composition | Theme Parks | National Parks |
 |
| My best photographic tip: In order to take great pictures, go to places where you can't help but take great pictures. Then work your way down from there... :) |
Some Photographic Tips
Right. Like you need another wannabe trolling you on the Internet telling you what to do. Well, I'm not going to do that. These are some broad, general topics based on what I see in a lot of pictures.General Tips
Feel free to ignore any of the following. My best practices isn't everyone else's, lol...Learn how to use your camera. I'm actually serious about that. Make sure you know how to press the shut... press the button that takes the picture, without shaking the camera. (As Charles Bronson said in The Magnificent Seven, "Squeeze, don't push." Okay, so it's not an exact quote, but it applies.) Figure out where the exposure info is on your display, so you know if there's going to be a slow shutter speed you can brace the camera. Learn what all the buttons do, and how to get to certain menus before you have to do it in the field. Know how to turn the flash on and off. How to get into the correct video mode. Some of that has to do with the next tip...
Read your owner's manual. (Same goes for your car, but that's someone else's website.) Even the most basic of today's digital cameras can do more than what even the most advanced cameras of 20 years ago were capable of. (Computers versus black magic analog-mechanical voodoory...) Video, real-time previews, hundreds of exposures per memory card, automatic white balance, plus hosts of other features.
You really don't even have to study it, just learn the basic operation and more advanced capabilities (like changing exposure values and special lighting conditions), and skim through all the tricks your camera can do. And keep a copy with your camera. (All manuals these days is usually a pdf file.) There's nothing worse than getting a flashing exclamation point, and not knowing what the problem is. (Generally, anything flashing in your preview screen is a problem...)
Keep all your images in the best quality and largest size you can. You can always make a big image smaller, but it's impossible to make a small image big. The information just isn't there, and memory cards are cheap these days. I also always shoot Raw+JPEG. There are arguments that you really don't need the raw file, but I've been saved a few times when I needed that little bit of extra information. With fast processors and fast memory cards, it's much less painful than it was just a few years ago. Did I mention memory cards are cheap these days? (Note that more basic cameras don't allow you to save a raw file, but they should still offer size and quality adjustments.)
Figure out how to manipulate the EV. One of the most important settings you should figure out how to manipulate, is how to adjust your Exposure Value (EV). If the part of the image you really want is in the shadows, and a light source is throwing off the exposure (for instance, a streetlight) you can fix the problem to a certain extent by adjusting the EV up or down. Since what you see on the preview screen is the image you're going to capture, make full use of being able to adjust the light levels.
The EV is a dial on more advanced cameras, it might be in the menus on more inexpensive ones. (On very basic cameras, it might not exist at all.)
Along the same lines, remember to use the ND (Neutral Density) filter on very bright days or in bright environments, like at the beach and on sand. It's the equivalent of putting on sunglasses, but doesn't affect or introduce any color shift.
Use HDR for difficult (stationary) shots. If your camera has the ability to bracket your exposures by a couple of stops, consider using HDR to overcome the lack of density of a digital camera sensor.
All of my Canons would flash parts of the display where highlight burnouts would occur. I could take the picture, but there would be no color or detail in those areas. I could reduce the burnouts, but then lose detail in the darker areas of the image, like the shadows. HDR overcomes these problems by combining the different exposures. The bane of HDR is anything that moves. People, clouds, water...
Go do a shoot before a major event like a vacation. Make sure the camera works like you think it should (size, resolution, focusing, etc.) including setting the correct date and time. Format all the cards you intend to use in the camera. Charge all the batteries you intend to take and make sure they keep a charge. (You should have at least two batteries. More if needed, whatever you need for a couple of days. But at least one backup battery.)
Sync all the camera's times. If you plan to have more than one working camera (for instance, each person using their own camera, using the picture function on the camcorder, etc.), sync all your camera's clocks. When it's time to collate the images, you can then just sort on date and time, and all your images will come out in order. Also, never change the clock from your home time zone. Many times you won't know exactly when you've changed time zones, and most of the time you'll forget. :-)
Learn how to use a good photo editor. I use Photoshop, because that's what I know. You don't need to use an editor as complicated as Photoshop, but you do need to know the basics of how to resize, crop and possibly fix a picture after you're at home. (Chances are, an editor came with your camera that can do at least that much.) It's not rocket science, but it does make a huge difference in how your pictures look...
Tripods. (You can read all about what camera hardware I use in Imaging.)
With today's optical and digital image stabilzation and fast CCD's, I don't use a tripod that much. The only time I use it for photos is at night when I need a steady platform for long exposures. (And even then, garbage cans, railings, and even fence posts may be good enough to steady the camera for a long exposure.) I probably use a tripod more with my video camera.
In crowded areas (like in theme parks or crowded viewpoints), and you should be aware of where your tripod legs are. They don't have to be fully opened with today's light cameras. If you can keep the tripod legs spread to the width of your body and keep it close, you'll minimize a disaster between your tripod and fellow human being.
In order to eliminate shake when squeezing the shutter release, figure out if your camera has a self-timer mode. Setting it for a couple of seconds allows you to press the shutter, then take your hands off the rig and let it stablize before the camera takes the picture.
Monopods. All monopods should have a tiltable head. Mine doesn't, but I have a ball head on it for smoother up/down, left/right panning when taking video.
Monopods have limited use in photography, other than using it for a selfie stick. You can use one at night to steady the camera if you brace the pod against something like a chair or wall and use the tiltable head to level the picture. It's still awkward.
Monopods (or tripods) should almost always be used in video. Shakey cam does not made good video (though sometimes it's the best you can do). Video needs a tripod if you're going to do something like ramping, but otherwise a monopod works fine for casual videography. Video requires movement. I often find I use my tripod much like a monopod when videotaping parades and other subects that move...
Composition is everything
Okay, it's mostly everything. Sometimes, it's about capturing a moment, and moments can be fleeting. I've learned to take the shot as soon as the camera is on. If that fleeting moment still exists, then you can do a better job of framing the shot and other adjustments if necessary. (For instance, when a big ol' bear decides to saunter down a nearby walkway. Of course, you should try not to become a video on YouTube of someone being mauled by the local wildlife. HAhahaha...)On the other hand, it might be worth waiting minutes for clouds to move (in or out of frame), or witnessing the entire sunset over the mountains for interesting lighting changes.
Someone once asked me how I learned to frame a picture. Not in those words, but that was the question. The obvious answer is Photoshop, and alter the image in post, lol. But my serious answer was watching 50 years of television.
Seriously.
Think about it. You've been seeing professional framing on television, especially in commercials, and in movies your entire life.
Yeah, rule of thirds, use the entire frame, keep in mind the general rules of photography, but keep in mind what you want to see, and how you want to see it. I think what television commercials and movies have taught me, is you keep the subject as the highlight, but there's value in every other part of the picture.
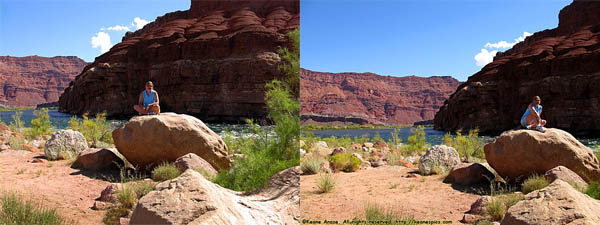 |
| Which is the better image? |
Frame the waterfall, and move your friend over to the side, or a corner if he/she is far enough away. (Framing another show with your friend being the focus costs nothing, so go ahead and do it, but the first one will be more interesting...)
Photographing Theme Parks
Much of this can be applied to any crowded place, but I'm talking about theme parks in general.One of the biggest problem at most theme parks, other than the other guests, is how close everything is. The "streets" are really quite narrow, and generally you'll want a wide angle more than a telephoto. My G1X has a 28-112mm (35mm equiv) telephoto, and found I appreciate the wide-angle more than the dislike the lack of telephoto.
You should also be aware that the consequences of shooting wide means you might have to spend more time in post-processing correcting for perspective and barrel distortion in close quarter shooting of vertical lines, like buildings.
For goodness sake, think about the people around you. For instance, if you're on a dark ride or area, make sure your flash is off, and your preview screen isn't bothering the people behind you. If your camera doesn't have a viewfinder, you can keep the preview screen mostly closed or mostly covered so you won't annoy those who don't share your... enthusiasm. (I have a picture of some idiot shooting video of a nighttime parade with an 8" tablet. Do you think she annoyed the people behind her? Of course she did.)
Be very careful about using tripods at night, since theme park guests aren't very observant about where they're going in the first place, especially children. Having someone knock over your camera and trip and fall at the same time won't be a good time for anyone.
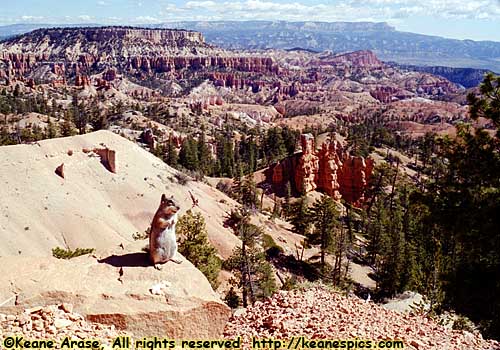
Photographing National Parks (and the West in general)
The National Park venues in the West are different from the ones in the East. Most of those in the East were created to preserve United States history. The minority are the geologic parks, the ones that preserve and protect an environment. (Great Smoky Mountain, Congaree Swamp, etc.) But most of the park venues can be shot with a wide to moderate zoom.
The opposite seems to be true in the West. There are a lot of historical sites, but it's the huge expanse of the big Western Parks that has a lot of the draw for me, and millions of other tourists. Glacier, Grand Teton/Yellowstone, Yosemite, Rocky Mountain, they're all larger than you think. I'm not sure you can get away without having some sort of strong zoom range on a camera. In other words, a camera with a fixed prime lens will work, but it will limit your ability to capture the parks. As big as a mountain is, the big National Parks are enormous and can dwarf a mountain range. My 35mm range of 35mm to 210mm worked well. If you shoot a lot of wildlife, a longer lens might be desirable, but that means an SLR, lenses and a tripod... I don't do that anymore.
My current camera only zooms to about 112mm (35mm equiv.), but I mainly bought it for landscapes, and it does an excellent job of that. My G12 zooms to about 200mm, so I may use that for a closer zoom if I need it, though some of the super zooms on the market are also a tempting solution, lol...
 |
| A poster in Grand Teton National Park. |
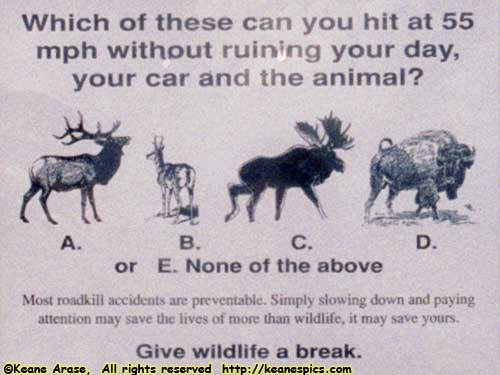
Wildlife as a general rule (and I should include people here) should be considered dangerous. Some are accustomed to people, but that doesn't mean you can go up to furry creature and pet it. I've gotten some great shots of a lot of wildlife, but always from a safe spot, mostly inside the car.
Be careful driving through the parks. Wildlife (and I absolutely include humans here) can clog the roads. (If you ever see a gaggle of people pulled off to the side of the road, there's probably some wildlife present. These places are especially dangerous, since humans in these situations become abnormally brainless and do things like stop in the middle of the road.)
In places like Yellowstone (or Custer State Park in South Dakota), it's not uncommon to be stopped by Buffalo Jams, where a herd will just cross a road in front of you, cars be damned.
A book on Minnesota described why hitting a moose with a car was so bad. You take out its skinny legs, which held up a thousand pounds of moose high enough off the ground to come right at you through your windshield. Yep, it'll ruin your day... And the car's day... And the animal's day...
Amd pay attention to your driving! You can't video tape and gawk and possibly have your full attention on the road. I should know, I do it all the time.
Finally, there are more suggestions in my diatribe about How I Plan a Roadtrip.
End Tips and Recommendations.
| Jump to: | About this site | Imaging | File Names | Tips and Recommendations | About Video |
|---|
- 10/02/2014 - About this site page split.
- September 2022 - Upgrade to v5.0.
| Help! | About This Site | Contact Me |